The Christmas Experience
Building a Gingerbread House
Building Gingerbread houses are a great way to bond with others. My friend, Aleta and I decided that we should make one and share our experience.
I bought a gingerbread house at Walmart, I thought it was pre-made, but it actually was pre-built, so all we had to do was decorate the house. The box came with the gingerbread house, white icing, green fondant, green and red candy, peppermints, and a piping bag.
We originally planned to follow the picture on the box but there were two sides so we combined it halfway through. We began by piping the icing from the bag that it came in because we thought it would be faster and let me tell you it was extremely messy so we transferred it into the piping bag with a tip for more control. The icing was very thick and difficult to spread so we had to use a butter knife for the roof.
While Aleta was icing the house, I made the smaller decorations out of fondant and it turned my hands green. I made the curtains for six of the windows and we had a lot of fondant left so I decided to make Christmas trees for the front.
We had to put on the smaller candy decorations as we frosted since the icing dried fairly quickly. We added the peppermints on the roof and the smaller candies for the door handle and on the sides. The house came on a piece of cardboard, and it looked a little plain so we added a little pathway at the front using the extra candies. With the extra fondant, I created two little Christmas trees. Aleta said it looks like two lumps of green poop.
A couple of hours later after everything had settled and dried we decided to take a bite of it. We both decided to bite the roof since it was the only open spot. The gingerbread was very hard, but I managed to break off a small piece but Aleta couldn’t and she detached the part of the roof with her mouth. The icing was very sweet, so we just ate the parts of the house that wasn’t covered in icing
In short terms, my hands turned green, my trees looked like green poop, there were crumbs everywhere, Aleta drew the door on the wrong side, the icing was kinda sloppy and messy.
The house turned out better than we thought. I think that if we had to assemble the house ourselves it would be a mess. I would rate my experience an 8.5 out of 10 just because it was messy.
Anna’s Christmas Cookies
Anna gave me her Christmas cookie recipe which was a Mint Shortbread Cookie dipped in chocolate. At first, I was very skeptical about the recipe because I thought the mint flavor would be too overwhelming and it looked really sweet like those sugar cookies at Walmart.
The cookies took me two days to make because the dough had to sit in the fridge overnight.
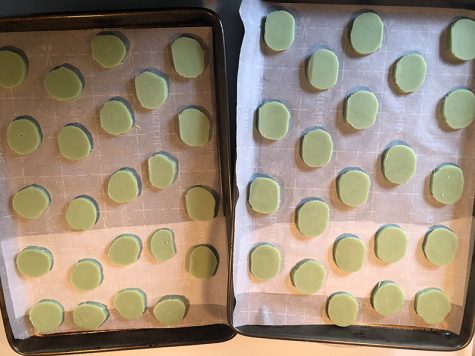
On the first day, I made the cookie dough which consisted of flour, butter, sugar, salt baking powder, food, and mint extract. I couldn’t find mint extract so I used peppermint extract, I hoped for the best that it didn’t affect the taste too much. I combined the ingredients and rolled the dough into two round logs so that they can be sliced the next day.
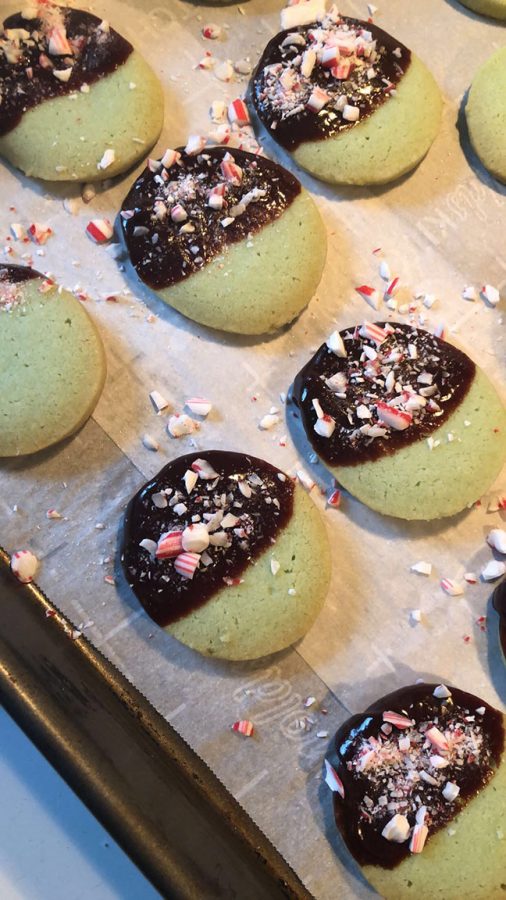
On the second day, I took the two logs out, and they were extremely hard. I smacked myself on the head with one and it really hurt. I sliced the logs and baked them for 20 minutes. After the cookies cooled down, I tried melting so chocolate but it kept burning so I had to add some milk to thin the chocolate a little. I didn’t have festive sprinkles so I crushed some candy canes and sprinkled them on top.
I had a couple of cookies that I didn’t dip in chocolate and I was munching on them as I was adding the finishing touches on the decorative cookies. The cookies turned out pretty good. There wasn’t a strong minty taste to them and I kinda tasted like a thin mint mixed with those dutch cookies that Asian moms put their sewing stuff inside.
I really like this recipe because it is different from the regular sugar cookies that people make each year and it was really easy to make plus it isn’t too sweet. The good thing about these kinds of cookies is that you can freeze and bake them at a later time. I will be making these again next year because they are so good. I was actually eating some when I was writing this.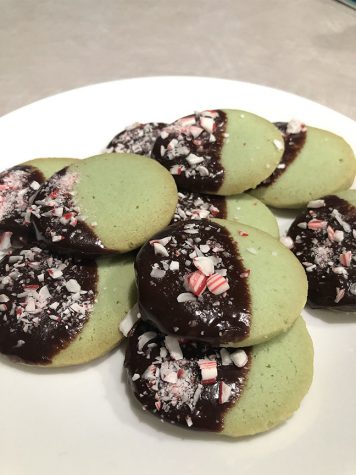
Mint Cookie Recipe from Butter With A Side of Bread:
Ingredients
- 1 cup butter softened (2 sticks)
- 1/2 cup sugar
- 2 tsp mint extract
- 2 cups flour
- 1 tsp baking powder
- 1/4 tsp salt
- 10-15 drops green food coloring
- 2 cups melting chocolate*
- festive sprinkles/ crushed candy canes (optional)
Instructions
- With an electric mixer, cream the butter with the sugar until the mixture is light and fluffy. Add in mint extract and coloring.
- Add flour, baking powder, and salt. Mix until it forms a dough.
- Divide the dough in half. On a sheet of wax paper, form each half into an 8-inch log. Chill the logs, wrapped in wax paper or plastic wrap, for at least 2 hours or overnight. (If you’re pressed for time, 30 minutes in the freezer works well too!) I always aim for rounder logs and end up with a more oval shape. It works!
- Heat the oven to 300°F.
- Cut the logs into 1/4-inch-thick slices with a sharp knife.
- Arrange the slices 2 inches apart on parchment-lined baking sheets.
- Bake the cookies on the top rack of the oven for 22-26 minutes.
- Transfer to wire racks to cool. Heat chocolate in a microwave for 1 minute, stir gently, and continue heating in 15-second
- increments until smooth.
- Dip 3/4 of the cookie into chocolate. Set on wax paper and add holiday sprinkles. Do not remove until cool and set.
*You can use chocolate chips + 1 tsp coconut oil or some shortening mixed in place of melting chocolate.*